Using bracketing and HDR for stunning imagery
Peter Li walks us through the process behind his incredible, detail-rich images of cathedrals
What are HDR and Bracketing?
HDR and bracketing go hand in hand in photography. Bracketing involves taking multiple photographs at different exposure levels to correctly meter for the dark areas, the bright areas and everything in between. High Dynamic Range (HDR) is the product of combining these bracketed images, turning all the collective tonal data into a single image ready for post-processing.
My inspiration: between reality and fantasy
From a young age, I have always loved console gaming, particularly adventure and fantasy titles from Japan in the 1990s that often depicted worlds infused with Renaissance and Gothic aesthetics. Living in Europe, I am fortunate to be close to these architectural wonders.
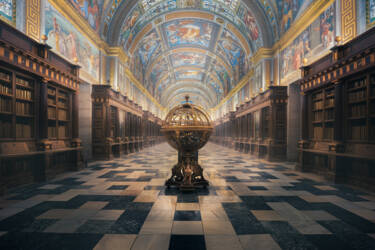
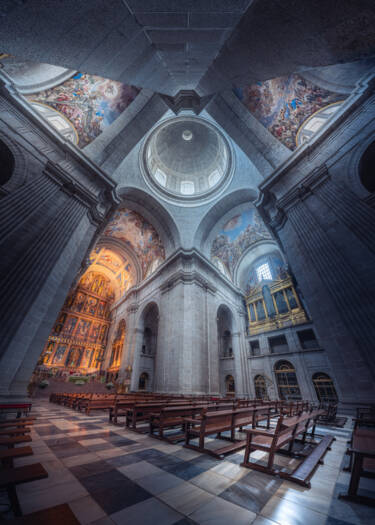
Z8 + NIKKOR Z 14-24mm f/2.8 S, 1/3 0.6 1.3 2.5 5 sec, f/8, ISO 200 (bracketed HDR at 14mm), Biblioteca del Monasterio de El Escorial 2023 ©Peter Li
When I photographed a cathedral for the first time, I was instantly taken by its beauty. The architecture of cathedrals is so distinct, and the textures, along with the soft natural light flowing through the space, create an otherworldly atmosphere. Many libraries and museums share this enchanting quality, reminiscent of scenes from a fantasy novel. It’s been seven years since I started captured these historical relics, and they still continue to inspire me.
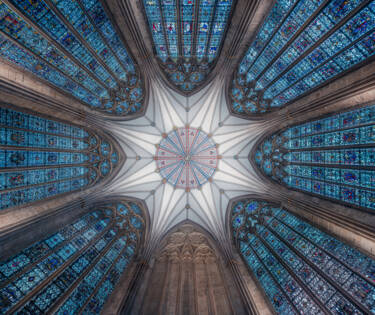
Z8 + NIKKOR Z 14-24mm f/2.8 S, 1/40 1/20 1/10 1/5 0.4 0.8 1.6 sec, f/8, ISO 125 (bracketed HDR panorama at 14mm), Chapter House at York Minster 2024 ©Peter Li
Challenges of photographing grand interior spaces
Photographing cathedrals illuminated solely by daylight can create an ethereal atmosphere. However, spotlights, candlelight and display screens often impact how the scene is lit. It’s a challenge to balance the extremes of light and shadow from natural daylight while harmonising the intensity and warmth of the other light sources. I find the interplay among these different light sources intriguing, as it broadens the possibilities for colour-grading the scene. I often create colour studies to explore what works best.
Given the complexity of lighting in cathedrals, HDR and bracketing are essential to my workflow. HDR enables the capture of details and colours that exceed our natural perception, allowing us to enhance tones to levels where a single exposure would begin to lose quality, thus unveiling subtle nuances that would otherwise remain unseen.
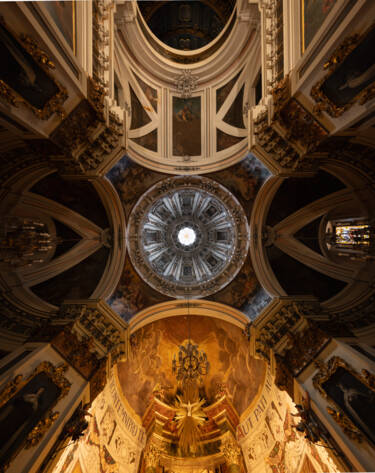
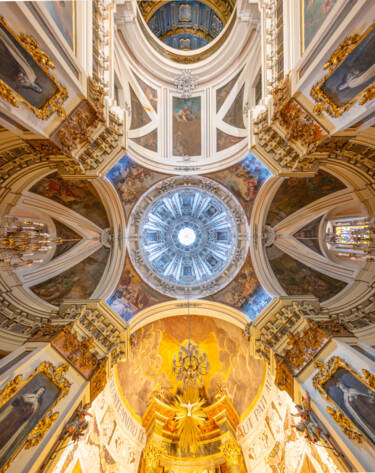
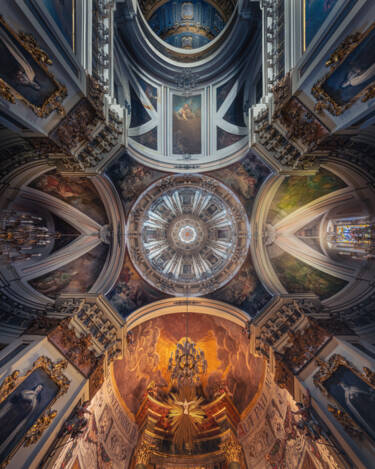
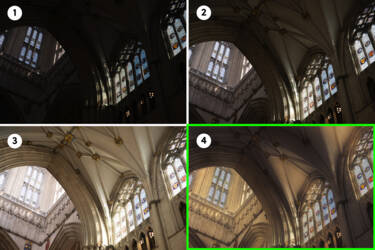
From left to right: HDR unprocessed, brightened image to see the colours in the dark areas, and final processed image Z8 + NIKKOR Z 14-24mm f/2.8 S, 1/80 1/40 1/20 1/10 1/5 sec, f/2.8, ISO 320 (combined bracketed HDR unprocessed and processed image), Iglesia de San José 2023 ©Peter Li
How to set up your camera for HDR
What’s in my camera bag?
I use the NIKKOR Z 14-24mm f/2.8 S and Z 50mm f/1.8 S with my Nikon Z8, a lightweight travel tripod and a ring mount for easy orientation changes.
Tripod: This enables slow shutter speeds at low ISO for better sensor performance, capturing intricate details and preserving more colour and tonal information. This can also be done handheld with very steady hands and the camera’s Vibration Reduction on, but a tripod is best.
Small aperture: A small aperture, typically around f/11, keeps the majority of the scene in focus. Test different f-stops to find the best for your lens. Consider bracketing another set of images with a wide-open aperture to mask out the sun stars in post-process if sun stars are not to your liking.
Manual focus: Use this to ensure consistent focus during bracketing, preventing discrepancies between exposures.
Capture in RAW: Always photograph RAW to retain maximum tonal information for post-process.
Remote/timer: Use a remote trigger (you can use the Nikon SnapBridge app for this) or set a two-second timer to dampen camera movement when pressing the shutter.
Clean your lens: This avoids smudges that can cause flares, which are difficult to correct in post-production.
Step-by-step guide to HDR in post-processing
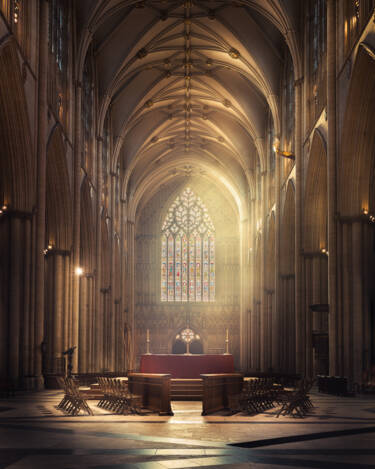
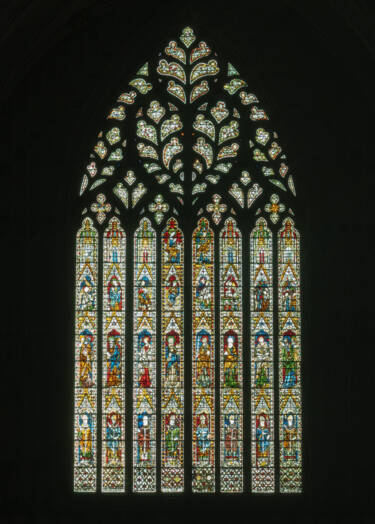
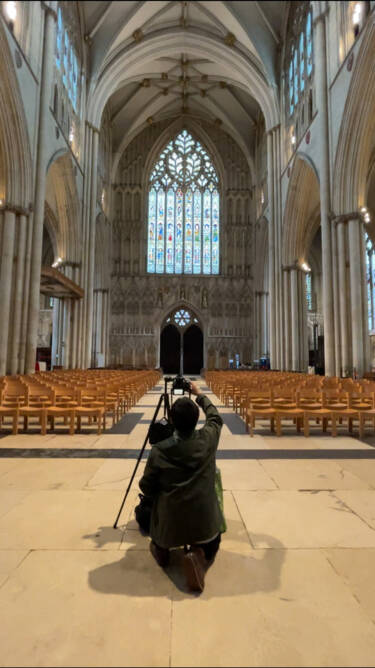
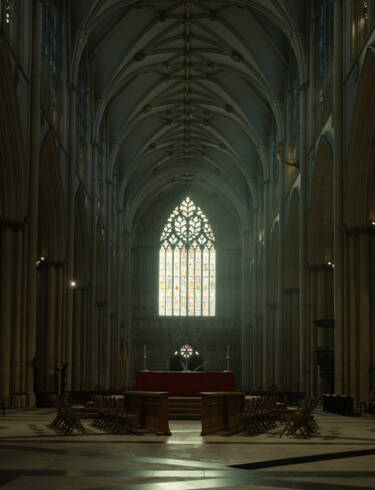
1. One of my favourite scenes I’ve photographed this year was during a project I did with York Minster (above). It was at sunset, with light streaming through the Great West Window. Scenes like this are where HDR is most effective.
To capture the scene, I decided to create a vertorama. This technique involves merging a series of vertically overlapping images to produce a tall image that conveys a sense of grandeur and accentuates the cascading pillars. The 50mm lens is excellent for maintaining straight vertical lines while also capturing more of the arching vaults.
I primarily edit using Adobe Lightroom so for some options I select you may need to find the equivalent features in your preferred software.
2. Here are three sets of five bracketed images, ranging from darkest to brightest: -2 / -1 / 0 / +1 / +2.
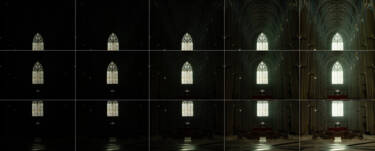
3. Start by metering for the brightest part, which is the stained-glass window. The remaining brackets are to capture the darker parts of the image.
4. Photo merge HDR & photo merge panorama
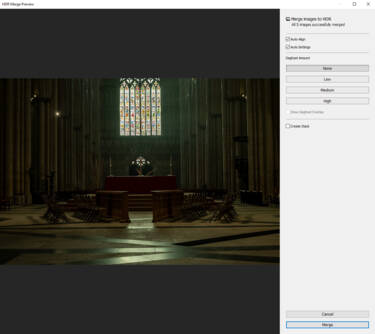
Highlight the bracketed images in Lightroom, then select Photo Merge HDR (Ctrl+H / Cmd+H), ensuring Auto Alignment is selected. For Auto Settings, I usually deselect it and make my own adjustments. Set the de-ghost amount to remove artifacts from moving subjects; otherwise, leave it deselected. After merging, a single DNG file will be created, combining all tonal information and ready for grading.
For panoramas, you can merge HDR and panoramas simultaneously by selecting the relevant frames together. However, I prefer splitting the process into two parts: merging HDR first and then merging the HDR frames into a panorama afterwards, as it’s less demanding on my six-year-old PC.
5. Post-processing / editing like a painting on a canvas
I work intuitively by using a pen tablet to apply adjustments to the image, which feels similar to sculpting or painting with a brush. This approach allows me to brighten, darken and adjust the vibrancy of different areas, creating a visual flow that guides the viewer’s eyes throughout the image. The pressure-sensitive pen enables me to make subtle changes in exposure and tone.
6. Lossless RAW colour information
Ensure that all tonal editing is completed before exporting to Photoshop or any other editing software for final adjustments and cleanup. Most software will convert RAW files into TIFFs, which are lossless, meaning you can save the file repeatedly without degrading image quality. However, TIFFs do not preserve the original spectrum of tonal data found in DNG/NEF RAWs, so be careful to avoid clipping the extreme highlights and shadows.
HDR not only enables us to capture reality with its exceptional colours and intricate details but also possesses the potential to transcend it, conveying a painterly quality that lies somewhere between realism and fantasy.
Hero image: Z8 + NIKKOR Z 50mm f/1.8 S, 1/60 1/15 1/4 sec, f/8, ISO 200 (bracketed RAW frames & the processed HDR image), York Minster 2024 ©Peter Li
More in Tips & Tricks
Featured products

Unlock greater creativity


